
For the 6th entry in our Brew Day Log series, we decided to keep it local, so on the 9th of September we headed over to Kutuma to document the brewing of the second batch of their Kölsch, Transa. And we weren’t the only ones to keep it local either. What sets Transa apart from other Kutuma beers (and, frankly, the majority of Romanian craft beers) is that it aims to use local ingredients only. And, with one exception, they pretty much nailed it. Let’s peruse the recipe for starters:
Transa stats:
- Style: Kölsch
- Grain bill: Pilsner malt
- Hops: Hüller Bitterer, Brewer’s Gold
- Yeast: Lallemand Köln Kölsch Style Ale Yeast
- OG (original gravity): 1046
- FG (final gravity): 1010
- ABV: 4.7%
Because the ingredients in this beer are rather unusual, let’s talk about them for a bit.
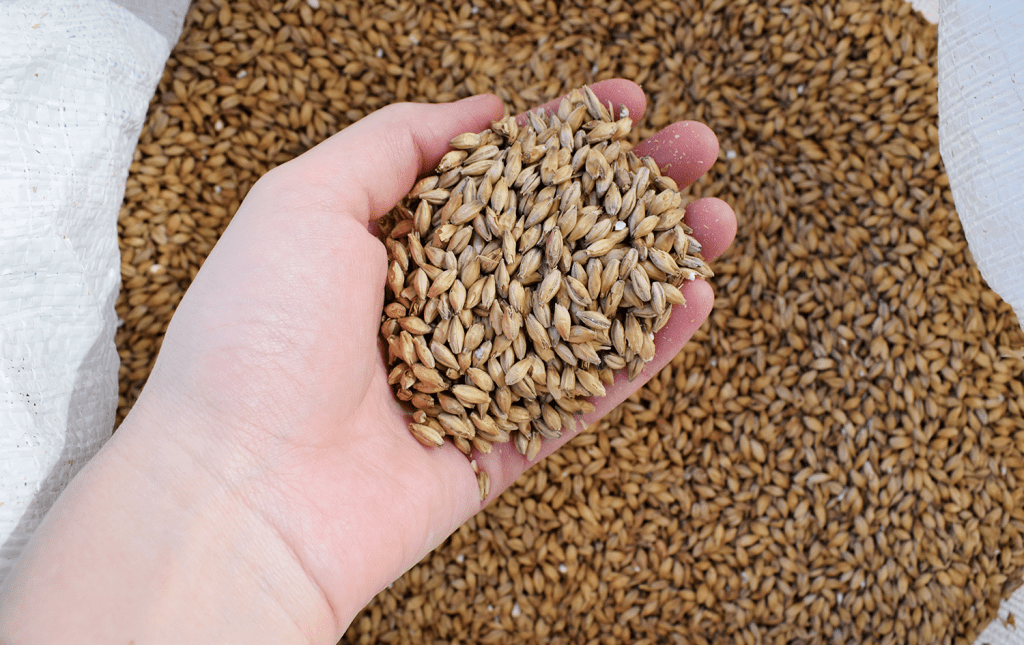
The malt used in this beer is Pilsner malt, produced by Maltberg Industry from Satu Mare. Romania has 3 companies classed under the NACE code for malt production (1106), which also include Soufflet Malt and Csíki Maláta Gyár. Because macro breweries are their main customers, they mainly produce base malts, with specialty malts taking up around 1-2% of their total output. Although the vast majority of Romanian malt goes to macro breweries, there are still some that use it for their base malts, such as One Beer Later and Nemțeana.
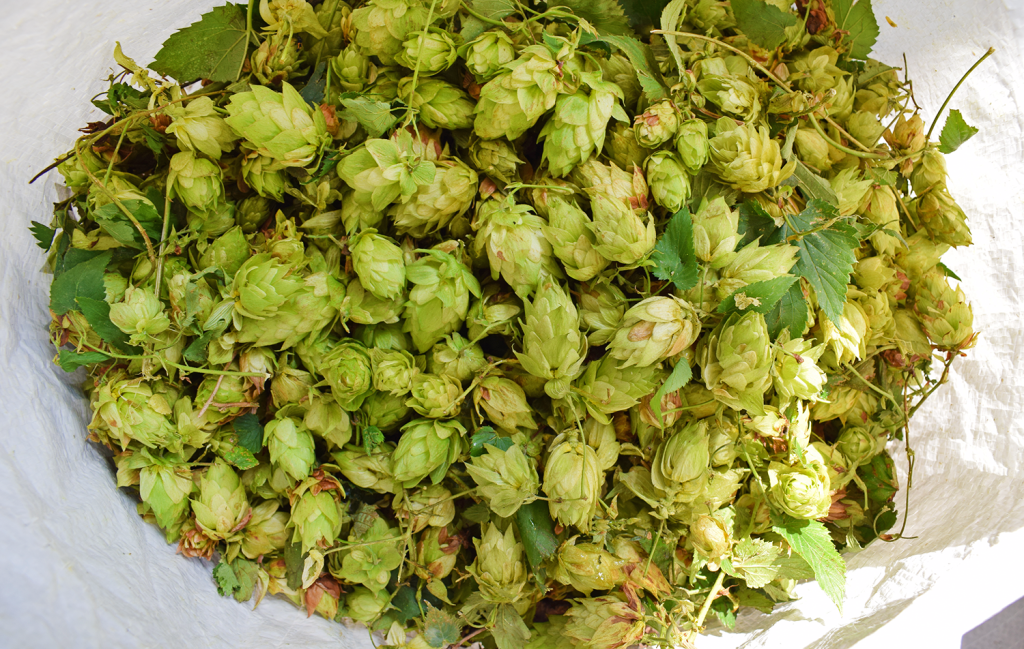
The true stars of this brew, however, are the hops. Kutuma used locally grown hops in the first batch of Transa as well, but they were pellets. For this batch, however, we were right in time for the hop harvest, and got our hands on 20 kilos of these bad boys. These cones of Brewer’s Gold come from a farm in Rădești (Alba county), and were picked up the day before and kept in cold storage, ready for today. The same hop farmer also grows the Hüller Bitterer hops we used in pellet form.
In case you were wondering, the vast majority of the hops grown by this particular farmer are actually bought by a pharmaceutical company – so these ones are among the lucky few to find their way into a beer.
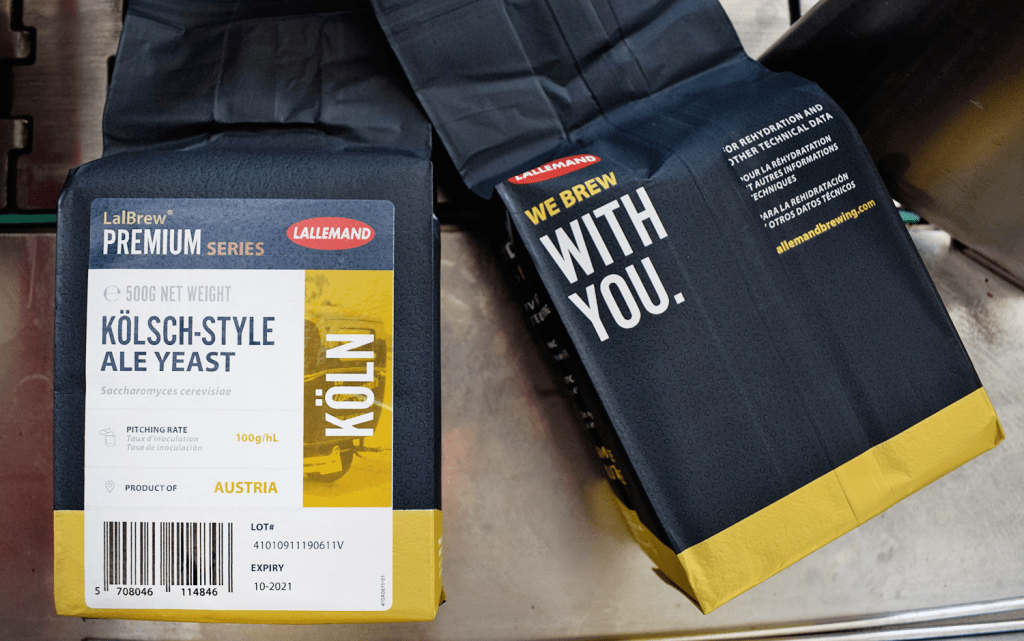
Now, although this beer aims to be made with local ingredients only, there’s one thing the Kutuma lads couldn’t get their hands on: Romanian brewer’s yeast. For starters, there are no local yeast labs that produce commercially available yeasts. This isn’t to say that there is no such thing as local yeasts. The problem is that they’re all cultures grown and used by the macro boys, who guard them fiercely. Apparently, Kutuma did ask Ursus if they can get some of their yeast (because, let’s face it, that’s as close as you’d get to using a Romanian yeast strain) but they were like ‘Yeah, nah’. So instead, they went for some Lallemand instead.
Oh, and the water we’re using is good old Cluj water, locally sourced from the Tarnița lake. But you probably figured that out already.
Now, as custom demands, it’s time for:
A look around the brewery

For us, Kutuma feels like home. Andrew has helped out at several local breweries as a contract brewer throughout the years (which is why you saw him pottering around in the Blackout and Hophead logs). But Kutuma was the first brewery he’s worked at, since 2017, and although it’s an on-and-off gig, it’s a place he’s particularly attached to.

When Kutuma first opened, they were by far the largest craft brewery in Cluj, with six 2000 litre fermenting vessels and a 1000 litre brew house. This bold move ensured they could keep a steady flow of beer running into the city. Since then, a seventh 2000 litre tank has been added – the tall, skinny one on the left. While the most of the equipment was bought from China, this fermenting vessel was made in Cluj by Inotec.

The bottling line is another piece of local equipment made at Inotec. It was their first attempt at making one, and it required a fair amount of tweaking to get it right in the beginning. Nowadays, it’s pretty much perfect, and the brewery hasn’t had an issue with oxidized bottles since.

Kutuma regularly produce their core range of beers, and at any time, at least one fermenting vessel is dedicated to each style. On top of that, there are seasonal brews and special editions, such as the Transa we’re brewing today.
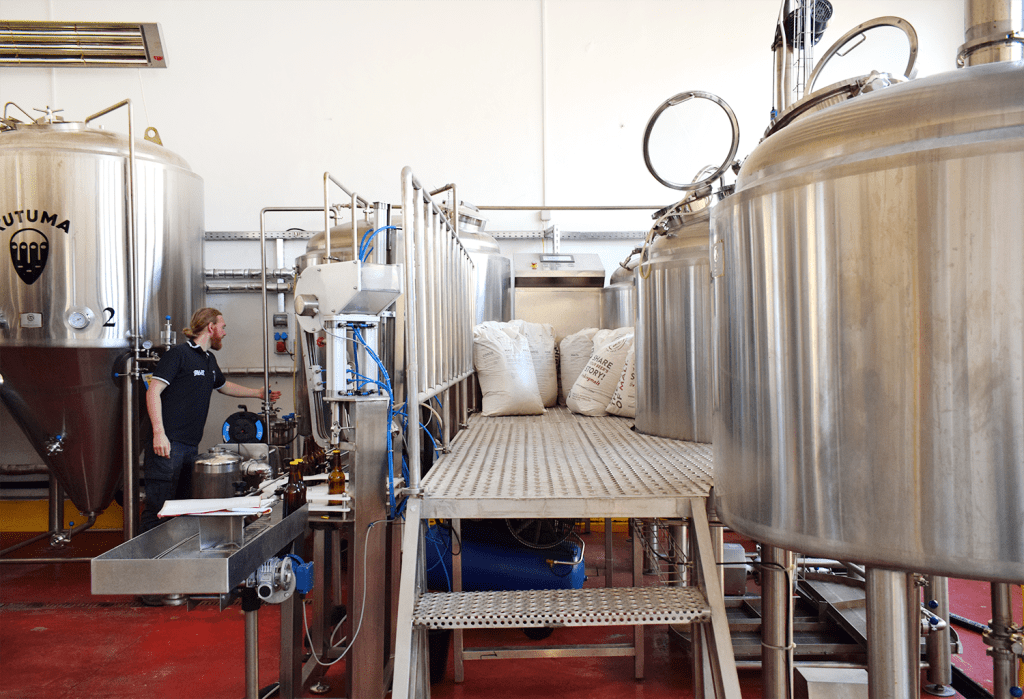
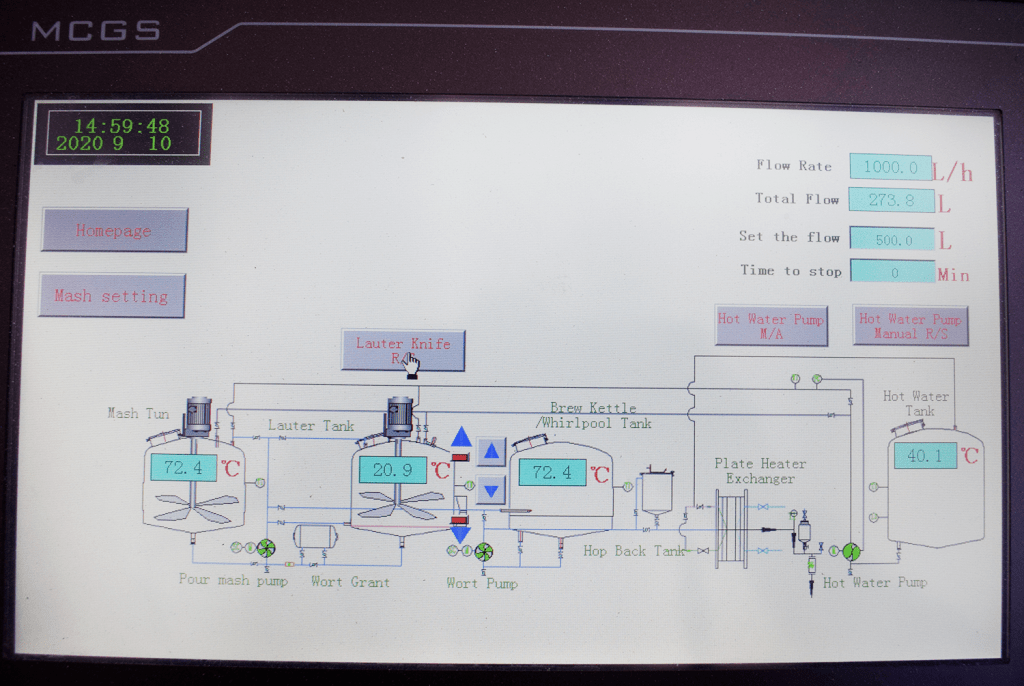
Kutuma use a 3-vessel system, consisting of a mash tun, lauter tun, and boil kettle/whirlpool. When filled right up, you can comfortably brew 1,200 litres of beer at a time.

Big vessels require a big cleaning station, and this 3-vessel CIP (clean-in-place) station has 3 separate 200 litre tanks: one for caustic soda, one for acid, and one for plain water. Behind the kegs, you’ll also see the keg washer, which when hooked up to the CIP station can quickly and efficiently clean up the kegs as good as new. The caustic soda tank is also able to heat, and in theory, with a few modifications, the CIP station could function as a pilot brewery for tiny test batches.

Kutuma also have a couple of 200 litre fermenting vessels used for small, experimental batches and yeast propagation. When we visited, one of them was filled with the beer made for the Samsara restaurant.
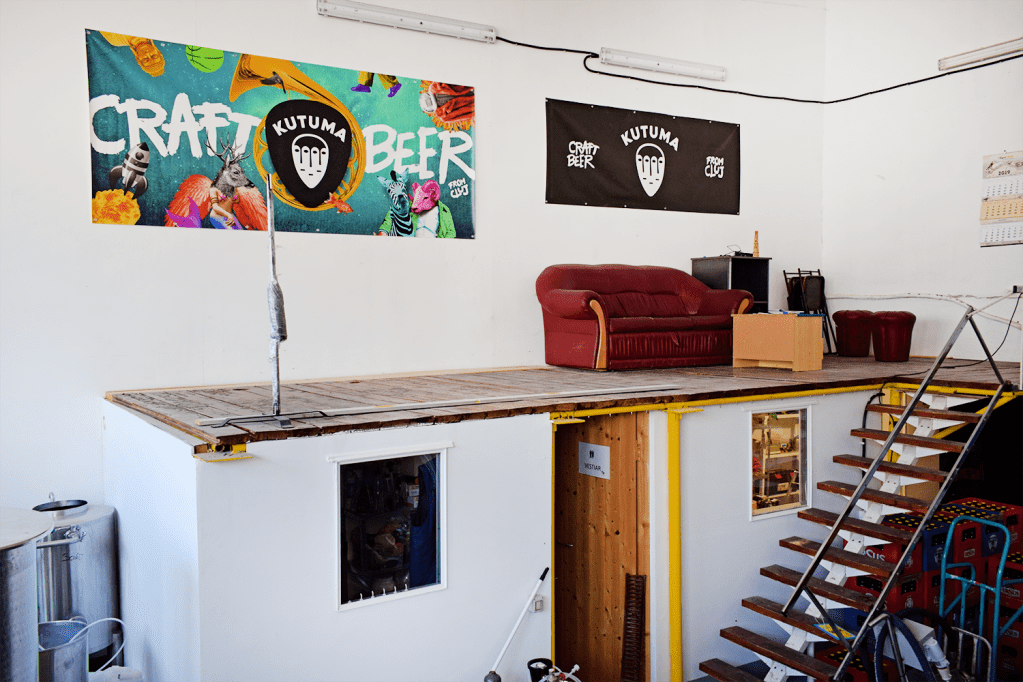
This used to be the ‘office’ back in the days before the expansion. Nowadays, it’s a sort of lounge area – not for the faint hearted, but if you’re brave enough, the comfy sofa is ideal for a cheeky nap. The guys are hoping to transform it into a small tasting area one day soon.

Speaking of expansions, 2020 saw them take over this vast space, which is now used for storage, as well as an upstairs office (sans the comfy sofa though). The doors at the back lead to spacious malt store.
Tour out of the way, it’s time we start brewing this bad boy!
07:50 – Arrive at the brewery
We roll up to the brewery 10 minutes early rather than the customary 10 minutes late, but when Andy is brewing every second counts. As soon as we enter the door, the steam generator is switched on so it can build up pressure, ready to heat up some cleaning water.
8:00 – Cool down strike water
First thing we notice as the brewing software boots up is that the strike water is a little too hot. We’re planning to mash in at 65℃, which means on this equipment, the strike water should be about 72℃. Right now we’re at about 80℃, so cold water is added to the hot liquor tank to lower it.
In the meantime, Andy starts preparing the water treatments. We’ve mentioned in other brew day logs that the water in Cluj is great for brewing. It’s pretty soft, letting us add the treatments we need. Today we’re adding in a little gypsum, a touch of magnesium sulphate, and a dash of lactic acid. In fact, we use a little more than a dash of lactic acid. Since this beer will be made only with base malt, we don’t have any specialty malts to help drop the mash pH into the ideal range.
With the treatments prepared and ready to go, the strike water has reached the right temperature. Andy opens up the right valves and starts to fill the mash tun with hot water, which, being British and somewhat old-fashioned, he insists on calling ‘liquor’.
8:20 – Mash in
The strike water enters the mash tun at a steady rate, and when we have around 200 litres in, Andy starts to slowly add in the malt.
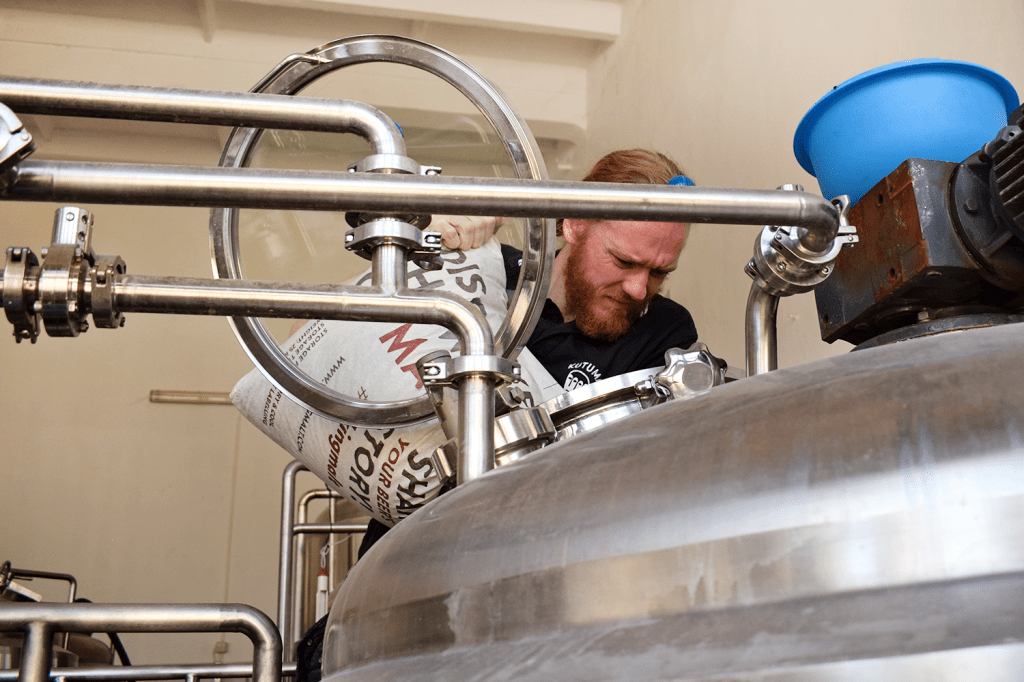
With half the malt in the mash tun, we throw in the water treatments to allow them to mix evenly throughout the mash.
8:35 – Start of mash
After around 15 minutes of gradually adding in the malt and strike water, everything is in the mash tun at just over 65℃. This is a pretty simple mash with just 200 kg of malt and 600 litres of strike water, which is quite thin, making for an easier transfer later. It’ll sit for 60 minutes before we crank up the temperature and take it to the next stage. During this time, the mash paddle constantly stirs the grain, encouraging a better mix and more consistent temperature throughout.

As soon as the mash is underway, we open up the steam valve on the hot liquor tank, and heat up the remaining water. This will be used for the sparge later, but Andy heats it up to around 95℃ during the mash, and will run it through the entire system to flush out the pipes and sanitize the heat exchanger.
8:50 – Check pH
Andy takes out a small sample of the mash to check the pH. It’s best to do this early on, as you extract more sugar during the first 20 minutes or so of the mash. By taking a sample early enough, you can make any necessary adjustments before it’s too late. The sample is taken to the sink to cool down, and eventually we get a reading of 5.42.

9:05 – Clean the FV
There’s no rest for the wicked, so while the mash does it’s thing for an hour, Andy begins to reassemble the fermenting vessel that he cleaned yesterday. The various valves, racking arm, thermometer, carbonation stone, and sample faucet were removed after giving the tank a hot wash with caustic, and left to soak in a cleaning solution overnight.
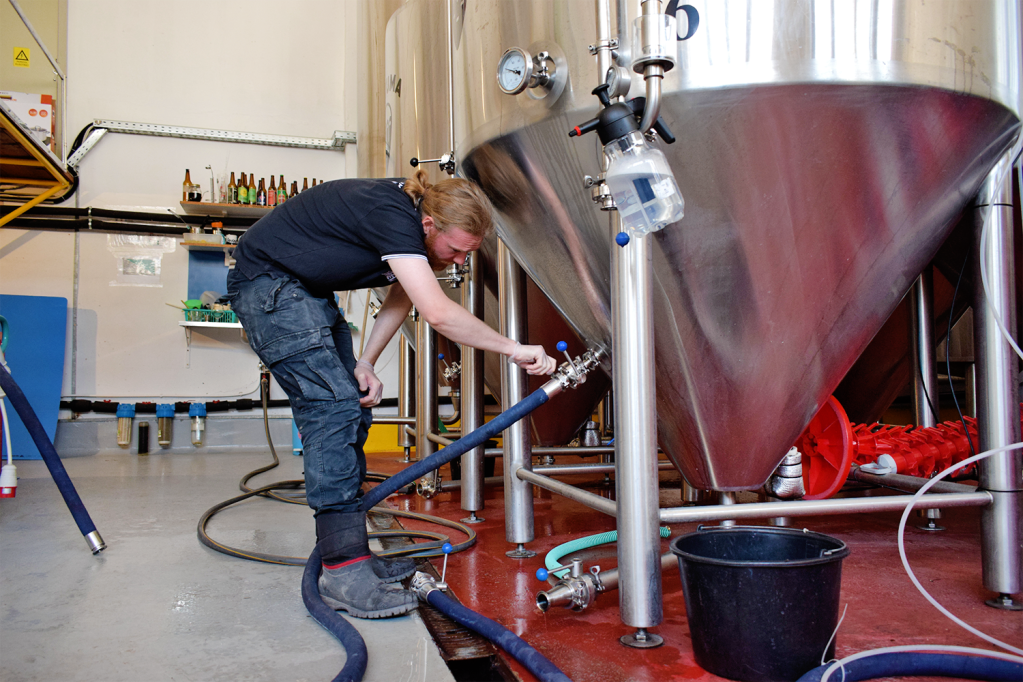
Once it’s all been put back together again, sanitizing acid is pumped into the fermenter, then recirculated at high pressure for around an hour. We use a low concentration of acid that will kill off germs and bacteria, but doesn’t need to be rinsed off. This is essential, as most tap water contains microscopic bugs that can harm your beer later on, so if you rinse your acid off with plain water, you’re effectively soiling your tank once again.
9:35 – Raise mash temperature to 72℃
After an hour of mashing, we start increasing the temperature to 72℃. There are many arguments for and against step mashing, but on this equipment, experience has shown that by heating up the mash to a second step, the transfer to the lauter tun goes much easier. It doesn’t take long to bring the temperature to 72℃, where it rests once again for 15 minutes.
This denatures the majority of enzymes, stopping any further conversion to simple sugars, and allowing only more complex chains to form. While that sounds slightly technical, it ultimately means that the beer will have a little more body.
10:00 – Mash out at 78℃
Like step mashing, it’s questionable whether mashing out is really necessary in this day and age. If you’re using a single vessel for mashing and lautering, it seems negligible, but for a 3-vessel system like Kutuma has, it has its advantages. First, the lauter tun is cold, as it’s difficult to warm it up in advance, so the hotter the wort is when it enters, the better. Second, since you’re transferring grain and wort, the less viscous it is, the easier it is to pump.
But at Kutuma, the main advantage is clearer wort later on. Over the years we’ve tried a few different mash schedules, and experience has taught that by mashing out at 78℃, the wort almost always runs clearer later on.
10:10 – Lauter transfer starts
As the temperature approaches 78℃, the steam valve is shut, the pump starts, and the mash tun valve is opened, allowing the entire mix to be pumped into the lauter tun. In a 3-vessel system, the grain and strike water are mixed in the mash tun, where it rests allowing starches to be converted into sugars. Then the mix is pumped into the lauter tun, which is fitted with a filter bed that separates the solid grains from the liquid wort. The third vessel is the boil kettle which, at Kutuma, also functions as a whirlpool vessel.

It takes around 15 minutes to transfer everything, and it’s important to allow the grain bed to stabilize and act as a natural filter as well as the metal one. So, as soon as the mash tun is empty, the lauter mixing-knife is stopped, and everything rests for 20 minutes or so.
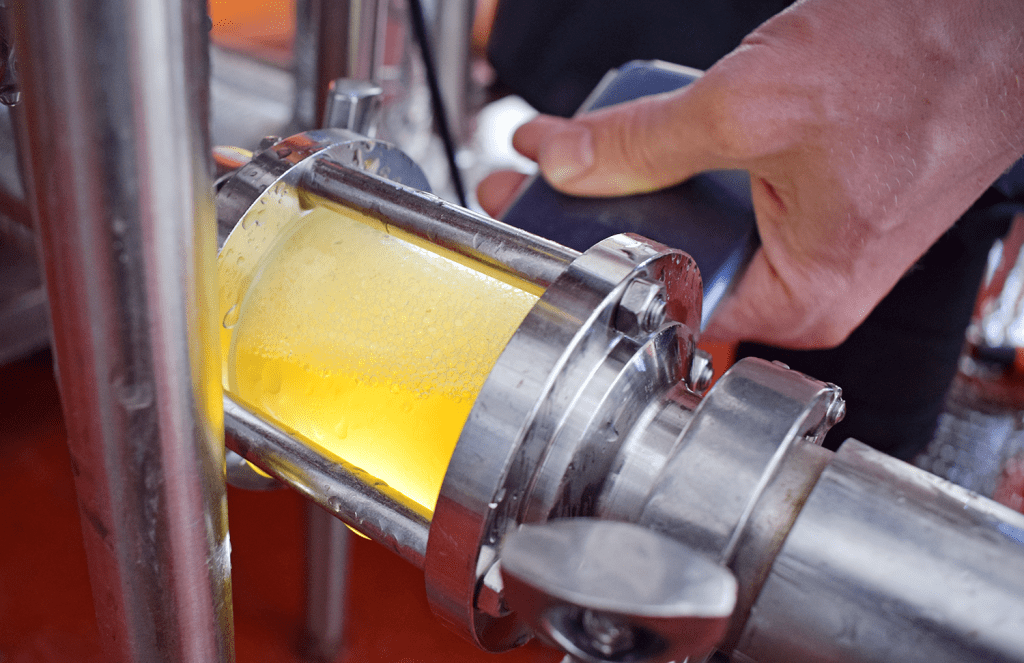
10:40 – Recirculate the wort
After a 20-minute rest, we start recirculating the wort back onto the grains. This helps clarify the wort before we start the transfer to the boil kettle, removing all the things we don’t want to boil, like the occasional stray grain husk. We start the pump and let it run until the wort is running clear.
During this time, the cleaning water that Andy had set aside in the boil kettle earlier is pumped out through the heat exchange and transfer hoses, sanitizing everything with heat. At the same time, cold water is added to the hot liquor tank to cool the water down to around 78℃, ready for the sparge. And right on cue, Norbert makes an appearance.

Although Andy usually handles the brew day on his own, as the head brewer, Norbert will pop in to make sure that everything is going smoothly, and to go over any details in the process. He’s also in charge of designing the recipes, and for today’s brew, he was the one who went out and picked up the fresh hops.
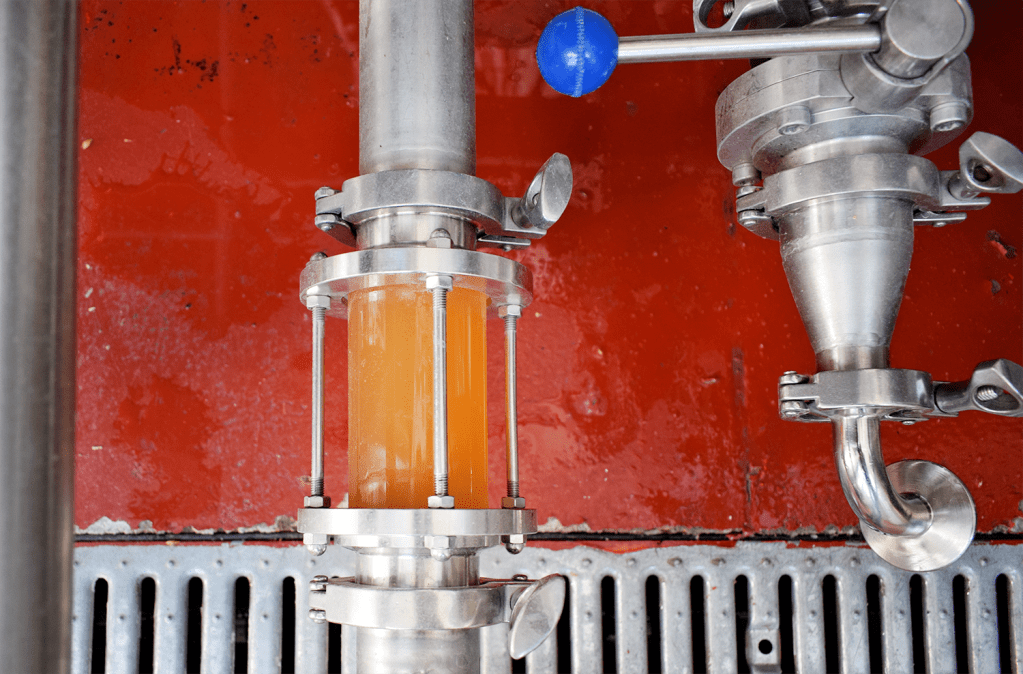
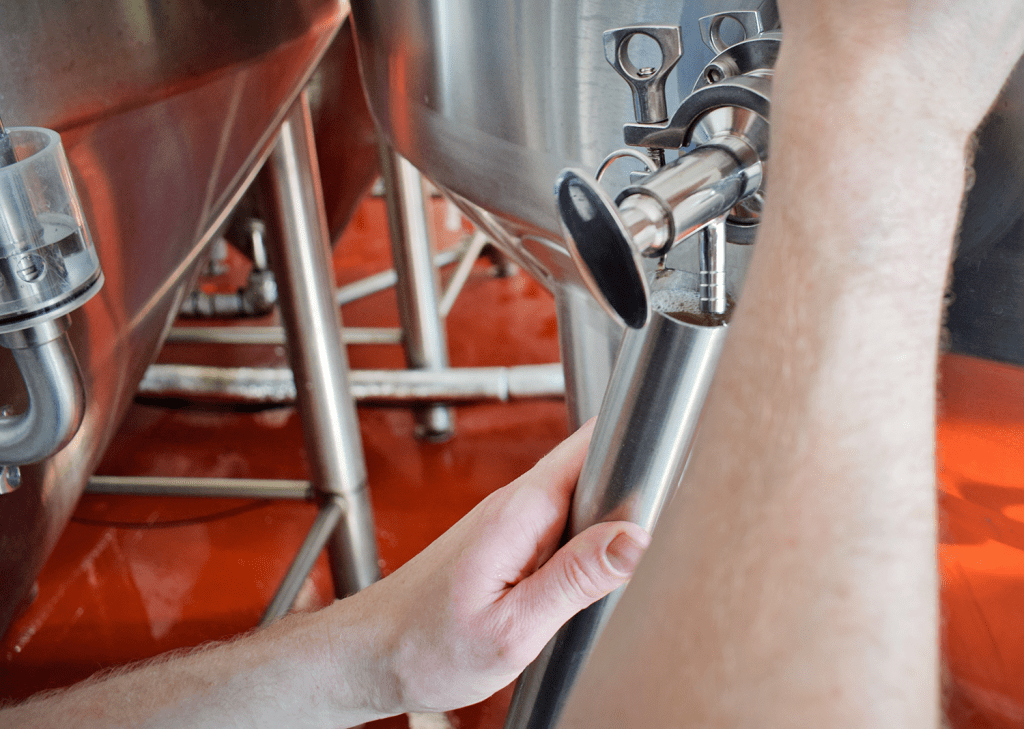
11:05 – Run-off to kettle starts
Before starting the run-off into the boil kettle, we take a gravity reading to see how successful the conversion was. At 1082, we’re happy with the first runnings, and can more accurately calculate how much sparge water to add. Once the gravity reading is taken, the boil kettle valve is opened, the pump is slowed down, and the hot wort steadily runs into the kettle.

We slow the pump down to prevent the run-off finishing too fast. With this transfer, it’s good to take it slow, to allow the sparge water to rinse off all of the excess sugars from the grains. After the first 100 litres are in the kettle, the sparge is also started, slowly adding extra water to the lauter tun, diluting the wort to our pre-boil gravity, and ensuring we’ll get at least 1,000 litres in the kettle.

11:50 – The return of Petre
With around 700 litres of hot wort in the kettle, we open the steam valve on the boil kettle to slowly start heating it up. At this point, Petre, Kutuma’s bottling master, returns from a short, well-deserved fishing trip. He’s been sorely missed, as the rest of the team aren’t so great with bottling and labelling. We’re a bit disappointed that he didn’t bring us any fish, but alas, you can’t have everything in life.

12:20 – Run-off complete
An hour and fifteen minutes after the run-off started, we have just over 1000 litres in the kettle. A gravity reading shows we’re at 1012, so the valves are closed and the transfer pump stopped. We don’t want the final runnings to drop lower than 1010, and since we have the volume we were aiming for, we’re not too worried about adding any more.
The temperature in the kettle is already at around 84℃, so we start the whirlpool pump to help mix everything and prevent the wort from catching and caramelizing on the heating jacket. At the same time, the rest of the wort in the lauter tun is run off into the drain, allowing us to dig out the grains a bit later.
12:25 – Lunch
Given the fact that this brew day is basically a ‘bring your wife to work’ day, we ditch the customary pizza, and indulge in some haute cuisine from the finest restaurant on the Baciu industrial estate.

12:40 – Digging out the mash tun
After wolfing down some lunch, Andy checks the temperature in the boil kettle, which is already at around 92℃. With time running down, he frantically starts to dig out the lauter tun. The steam generator used to function far less efficiently, and in the old days, it was possible to clean the lauter tun before reaching a boil. Not anymore, but that’s okay, the quicker you reach a boil the better.

12:50 – Boil starts
While the lauter tun is far from sparkling clean, the boil starts. Andy takes another sample for a gravity reading. This pre-boil gravity will let us know if we need to boil for a longer time to increase the gravity, or add hot water to dilute it and bring it down to where it should be. Today, we’re a little high at 1052, so we’ll add in around 100 litres of hot water.
13:00 – Clean out the lauter tun
With the boil underway, Andy returns to cleaning out the lauter tun. The pressure washer gets rid of the worst, and by removing one of the filters, it’s easy enough to ensure there’s no grain left behind. Hot water is pumped from the clean mash tun through any pipes that previously had wort in them, ensuring this side of the brewhouse is washed out and ready to go again tomorrow when Andy will brew up the second half.

13:20 – Bittering hops added
The first hop addition is at 30 minutes. As this is a bittering charge, we’re chucking in some Hüller Bitterer pellets. While we could use the fresh hops for bitterness, it would destroy the delicate aroma compounds, and we’d need a lot of them to get enough bitterness.
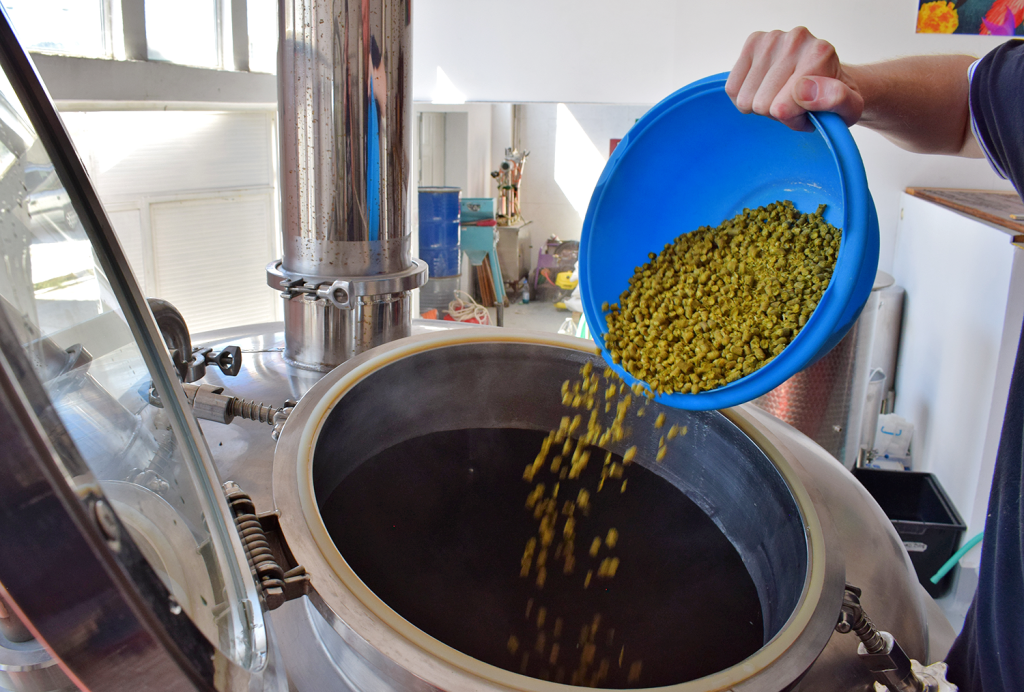
13:40 – Green hops added
Ten minutes before the end of the boil, we add in the first 5 kg of fresh hops, along with a sachet of yeast nutrients. Given the fact that Transa will be brewed in two batches, we’re using 10 kg of hops today, and the other half tomorrow. There’s a wonderful smell as the fresh hops drop into the boil kettle, though Andy soon starts to worry about potential blockages…

13:45 – Whirlpool pump blocked
… and five minutes after adding in the fresh hops, that’s exactly what happens. Luckily, there’s a backup pump we can use if needs be, but for now, we’re not sure if it’s the pump or just the valve. If it’s the latter it’s not so bad, and we should be able to continue.
We attempt to unblock the pump using water. When sprayed at high pressure, this will normally clear typical blockages in the pipes, but this doesn’t seem to be a typical blockage, and we’re not making any progress.
13:50 – Drop temperature to 85℃ for whirlpool
The final hop addition is meant to be whirlpooled at 85℃. To drop the temperature, we have to run the wort through the heat exchange, and back into the boil kettle. To do that, we need the whirlpool pump. This is the moment of truth. If the wort doesn’t flow, the pump is blocked, and that can be a big problem.
Fortunately, the wort flows through the heat exchange with no problem, and returns to the kettle, gradually dropping the temperature. That’s good news for now, it just means the whirlpool valve is blocked, but we can deal with that later.
14:25 – Final hop addition
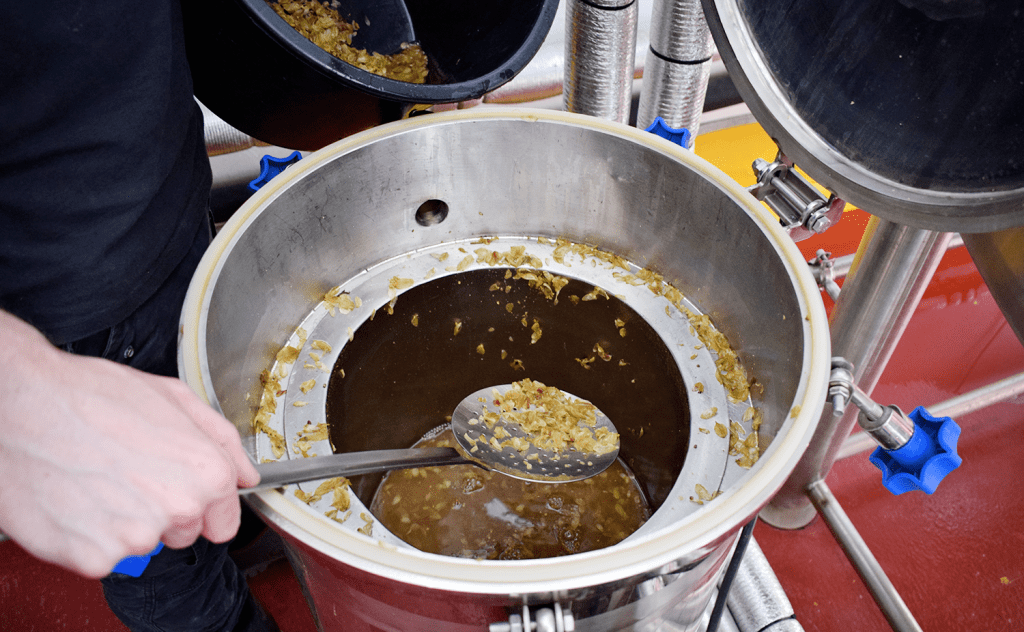
Once the temperature in the kettle hits 85℃, we stop recirculating and throw the last 5 kg of fresh hops in. Since the whirlpool valve is blocked, we use a 35 minute hop stand rather than spinning them for 20 minutes, and settling for another 15.
Andy grabs the mash paddle to make sure they’re all mixed in properly, and spins them a bit in an effort to encourage them to drop in the centre, and not cover the exit valve. If that gets blocked, we’ll have big problems transferring to the fermenting vessel.
14:30 – Clean out hopback
While the hops sit and release their various oils and compounds into the wort, we take a look at the hopback. This is a useful piece of equipment, especially for a beer like this. It’s a small vessel fitted with a filter that is placed between the boil kettle and heat exchange. Traditionally, brewers would fill this with hop cones, in order to impart hop aroma as the wort traveled to the fermenter.
However, at Kutuma it’s mainly used to prevent any solids reaching the heat exchange. When chilling the wort, it passes through the heat exchange via a series of thin pipes, which can easily become blocked by hops and trub if you’re not careful, so a hopback is a handy tool.
With all the loose hop matter in the kettle, we expected the hopback filters to be pretty blocked, but they were surprisingly clean, and only needed cleaning out a little bit, ready for the transfer to the fermenter.
14:55 – Hydrate the yeast
Just before we start the transfer, the yeast is added to a small, 30 litre yeast tank. Earlier in the day, the vessel was filled with 90℃ water. This sterilized the tank, but some was left inside to cool down. Once the temperature drops to about 30℃, dry yeast is added and allowed to hydrate. After 15 minutes, it’s mixed up to produce a slurry.

15:00 – Transfer to FV starts
Now is the second moment of truth. We have a feeling that there will be a blockage somewhere along the line, slowing the transfer down considerably. But everything starts well, and soon the wort is flowing nicely into the fermenter. It does slow down a couple of times early on, but a simple clean of the hopback seems to resolve the issue. After that, it’s a little slower than normal, but it’s flowing!
15:20 – Drop the yeast
Once the transfer temperature has stabilized, it’s safe to drop the yeast in. The yeast tank is attached to the transfer hose, so all we need to do is put the tank under a little pressure, then open up the valve. The yeast shoots into the transfer hose, and flows along into the fermenter with the rest of the wort.

It’s a nice system that means you don’t have to worry about opening up the fermenter again after the acid wash and pressure check.
15:50 – Start milling
As soon as we’re happy that the transfer is running fairly smoothly, Andy prepares to mill the grains for tomorrow’s batch. The Kutuma mill is a beast, and eats through grains pretty fast, milling to a pretty decent crush, and leaving the husks mostly intact. We get through a couple of sacks before we’re needed back inside.

16:10 – Transfer to FV end
Normally the transfer to the FV takes around 40 minutes at Kutuma. Today it took 70 minutes, during which time the hot liquor tank would have overfilled. Before that happened, we started pumping the warm water into the mash tun. This would be used to help clean out the kettle at the end, but 600 litres would be left in for tomorrow’s strike water. However, the transfer took so long that even the mash tun started filling right up.
Eventually though, all the wort made it to the fermenter without any blockages, and we managed to draw off as much as possible. But we were about to learn that brewing the beer was the easy part…
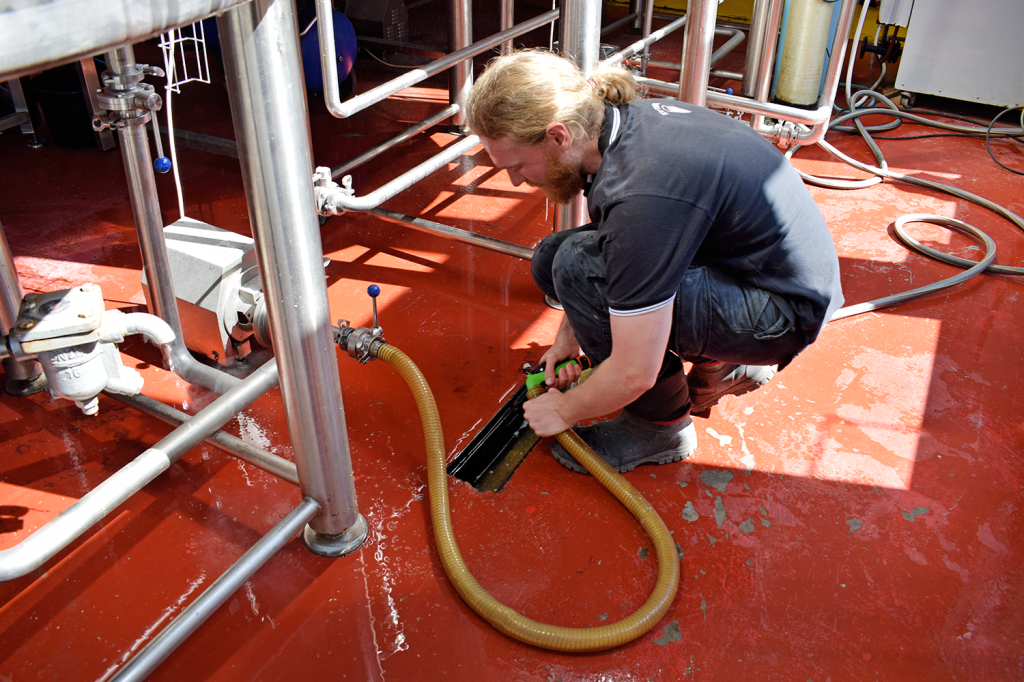
16:20 – The big clean
It’s not unusual for the Kutuma boil kettle pipe to become blocked with hops and trub when it’s being cleaned. Normally, shooting water up the pipe does the trick, and everything flows eagerly down the drain. That wasn’t the case today. Even though the hops behaved themselves during the transfer, when it came to cleaning them up, they refused to cooperate, and lodged themselves in every available opening. Pipes, valves, even the pump, all were completely jammed up with little green devils. So after several futile attempts to get them out, we had to pull out the big guns.

That’s right: we dismantled the piping from the boil kettle to the heat exchange. This resulted in about a hundred litres of scalding hot hoppy mess spilling into the brewery. And that was only the beginning. Each valve then had to be hand-picked clean, the pump had to be partially taken apart, and hops were causing mayhem right up until the hopback. Fortunately, the hopback kept the heat exchange safe from the onslaught! And eventually they were all out of the system.
17:35 – Hop mess cleaned up
With the help of Petre, we managed to clean the big mess up in about an hour. The place smelt good though! Once the floor was cleaned, Andy reassembled the pipework, and gave everything a good long rinse out with hot water. It took some time, but eventually, everything was clean and ready for tomorrow.

But, there was still malt to finish milling and the original gravity to check. Andy pulled a sample from the fermenter, and at 1047, we were just a little over our target of 1046. However, this could be balanced out the next day when the next 1,000 litres were brewed.
18:00 – Finish milling malt
Cleaning out of the way, all that remained was to mill the last few sacks of malt. Not the ideal end of the day, as the dust sticks to your already sticky, sweaty skin, and makes you feel even grimier. But, it’s better than doing it first thing in the morning. This way, Andy would be able to start brewing the second half of Transa first thing in the morning.
19:00 – Done!
After milling the last sack, everything was cleaned down one last time and put away. A few checks of the control panel and fermenter just to be sure it was all good, and we were ready to head out. At 11 hours, it’s not the longest brew day we’ve attended (the 15 hours spent brewing Blackout‘s first batch of Quantum Suicide definitely takes that award), but it was one of the messiest. And, since Andy hates mess with a vengeance, he adjusted the process for the next day.
Instead of attempting to whirlpool the fresh hops in the boil kettle, the hot wort will be boiled as normal, but no fresh hops will be added until the hop stand. The wort temperature will be dropped to 85℃ in the kettle, before it transferring to the lauter tun, where the fresh hops will be added, to prevent them getting into any valves, pumps, or pipes. From there, digging them out will into a barrel will be as easy as digging out the spent grain.
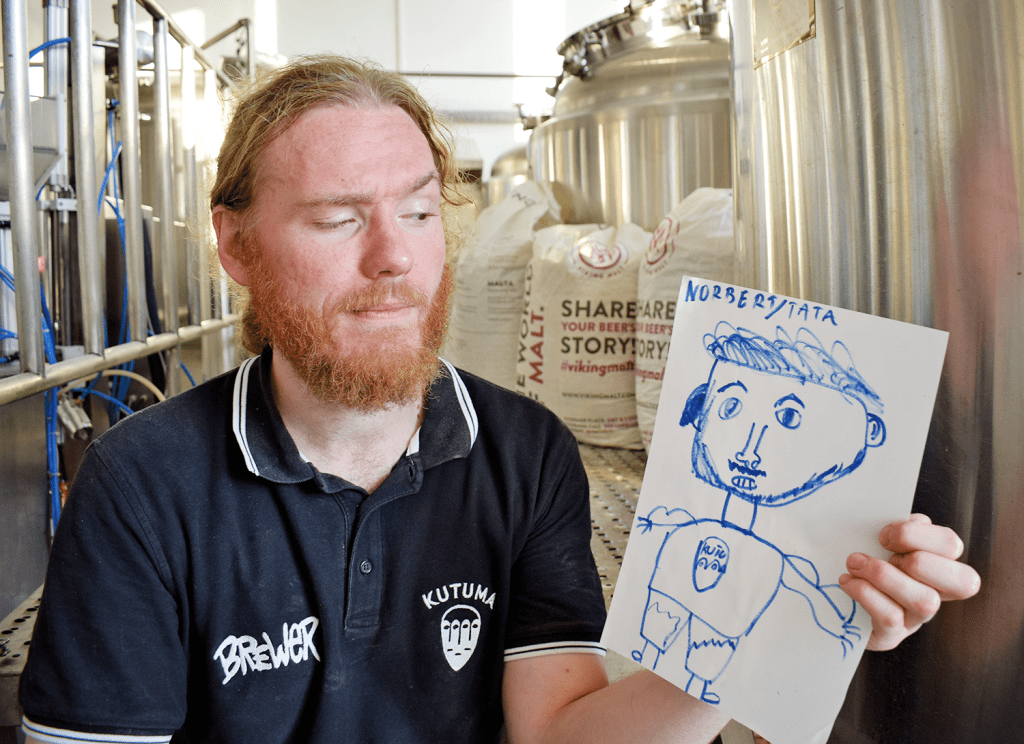
All that remains now is to wrap up the brew day log with a photo of the brewers. Unfortunately, Norbert left ages ago, but we found this suitable replacement laying around. As for you, make sure to get out there and grab a pint of this one of a kind tipple.
Cheers!
