
For the third entry in our Brew Day Log series, we joined Hophead as they brewed batch 97 of their flagship IPA, Opium. What makes this batch special is the fact that it’s the first beer made at their new brewery. And what better way to christen your shiny new equipment than by brewing a crowd favourite? So on May 8th, we headed out to see history in the making.
Opium stats:
- Style: West Coast style IPA
- Grain bill: pale malt, Vienna malt, CaraBelge, Cara Pils, acid malt, Melanoidin
- Hops: Centennial, Nugget, Cascade
- OG (original gravity): 1063
- FG (final gravity): 1017
- ABV: 6.5%
Opium may not be the first beer brewed by Hophead (the first one was Auto Pilot), but it was part of their 5-beer debut range, back in November 2015 (which sold out in 10 days). And it was popular demand that made Opium a flagship beer, and ensured that Darko and Dana must brew it so often. The name ‘Opium’ was born one day when Darko and Dana were telling a friend about IPAs and beers being shipped to India. Their friend thought that, since India also produces a lot of opium, it would make sense to call their beer that way. The name sounded pretty catchy, so they stuck with it.
Although this is officially batch 97 of Opium, the number of brew days is in fact higher. Back in the day (not that long ago, actually) when Hophead were brewing on a small setup, they used to brew this beer in 2-3 batches before filling a fermenting vessel. So the real number is closer to 250.
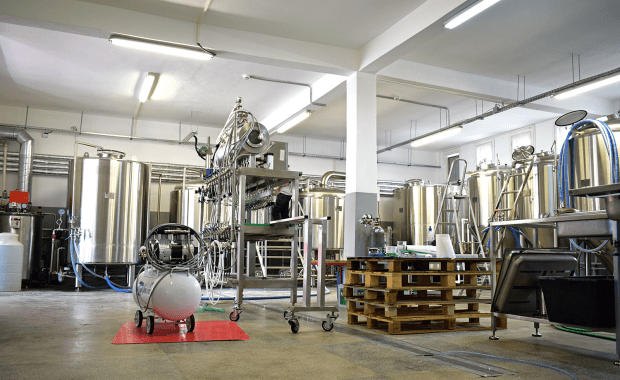
A look around the brewery
On to the important stuff: the new Hophead brewery! For many years, Hophead were a nano brewery on Mehedinți street, but back in August last year, they posted a sneaky preview of great things to come. And luckily for you, we arrived at the brew day early enough to give you a tour before we get started. You folks ready?

‘Enter at your own peril, past the bolted door
Where impossible things may happen
That the world has never seen before!’
‘In Darko’s Laboratory
Lives the smartest boy you’ve ever seen!’
But seriously though, this place is massive.
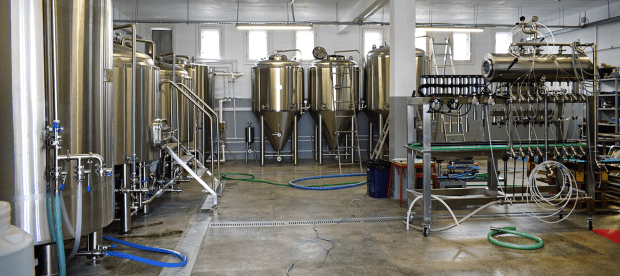
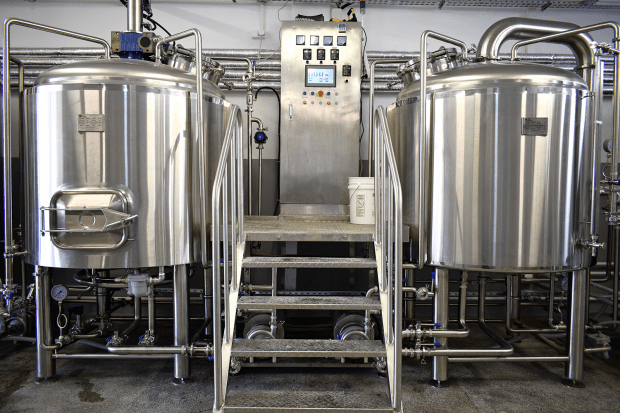
Comparing the new setup to the one in Mehedinți is like comparing homebrewing to taking it up to a commercial scale. The photos don’t do it justice, but suffice it to say that this is the biggest brewery (in terms of total area) we’ve ever visited. There are still some pieces of equipment waiting to be brought over from the old place, but Darko believes that the current number of fermenting vessels (two 1000 liters and one 2000 liters piece) will suit his needs just fine. It’s a bit early to quote exact figures, but Darko reckons his maximum output could reach 720 hectoliters per year, with the new equipment.

This state of the art bottling line is a far cry from the small one they had at their old brewery, and it truly is a beauty to behold. And with enough man power, Darko is confident that he can bottle an entire batch in a day, thanks to this bad boy.

Speaking of new equipment, the mill is also a recent addition. Hophead use whole Weyermann malt, which they crush to the desired size before the brew day.
This larger setup doesn’t just mean more beer though. The simple ability to pull a pallet into the brewery directly means that a job that used to take two people a whole day of hard physical work now takes around 2 minutes.
The main benefit of the expansion is the time gained by Darko and his crew. One brew day creates more beer than 3-days of brewing on their old set-up. Time saved simply moving ingredients and equipment saves about another day each week. This gives the guys time to focus on new recipes, experimentation, events, tours, and much more. Speaking of which:
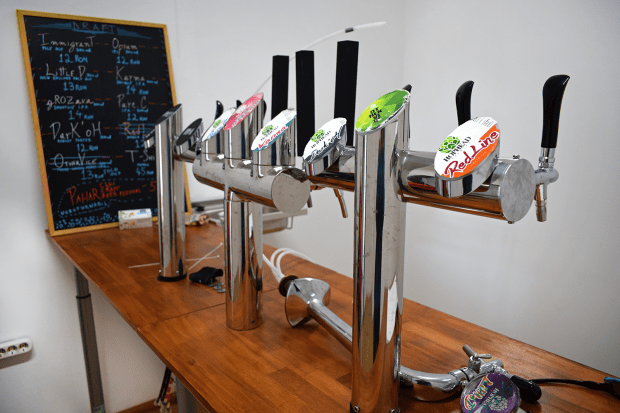
You probably remember these taps from the craft beer festivals you’ve attended. It’s unlikely you’ll be seeing them in action this year, but here’s the good news: the new brewery is big enough to accommodate a taproom, so you can enjoy the Hophead beers straight from the source.
But before we start brewing, there’s one more thing we want to show you:

A total of 23 solar panels line the brewery building, and they actually provide more electricity than the unit needs. However, this is partly due to the fact that Hophead use a steam generator for heating. If they were using electric elements to heat, they would have to rely on the electricity grid for the brew days, otherwise the process would impact other pieces of equipment, such as the pumps.
Now you’re probably wondering: how does one go from this…

The itty-bitty 50 liter Braumeister they started on
… to this?
1000 liter brewhouse
In a very fitting way, Morcheeba’s ‘Rome wasn’t built in a day’ is playing on the radio as we’re touring the brewery. And Hophead truly does fit the bill. It is a brewery that grew bit by bit over the course of 4 and a half years, developing a wide range of beers, trying to meet demand on a setup that grew too small very fast, playing catch-22 with the authorities in terms of paperwork, and earning a well deserved spot in the hearts of the craft beer community. If there’s one brewery we were always rooting for and waiting to see them get to the next level, then Hophead is definitely the one.
Right, sentimental background out of the way, let’s get this show on the road.
8:40 – Strike water heating
As we arrive at the brewery, we check in with Darko and Marian to see where they’re at with the brew. They’ve been here since 8am heating up the strike water for the mash, getting it just a few degrees above the desired mash temperature. This is easily achieved on equipment you’re familiar with. But as this is the first time the lads have brewed on this system, it’s a little bit of guesswork. The strike water is a little low, delaying the brew day by about an hour.

Today, we are joined by Marian, one of the two full-time Hophead employees. Like Andrew, he has helped out at other breweries in Cluj, but unlike Andrew, he prefers a more monogamous relationship with his employers, and has been brewing at Hophead for almost a year.
09:00 – Mash in
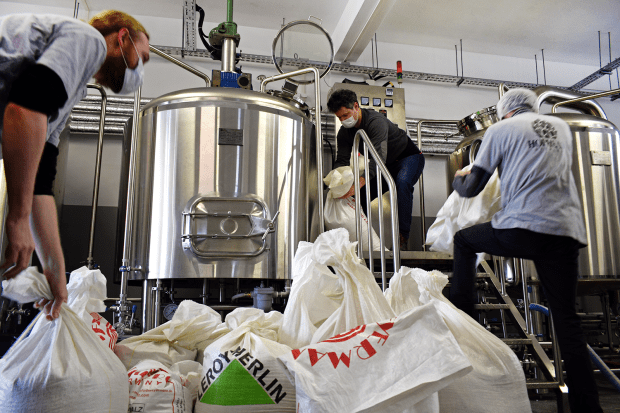
By 9am the strike water is still a little low, but workable, and so the lads mash in. The grains are dumped into the mash tun, which is filled with around 500 litres of strike water. All the while, the racking arm is spinning, mixing the grains and water up. More water is added along with the grain, and eventually there’s around 850 litres of water to 325 kg of grain.
Along with the grains, a number of water treatments are added, including gypsum, calcium chloride, magnesium sulfate, and baking soda.
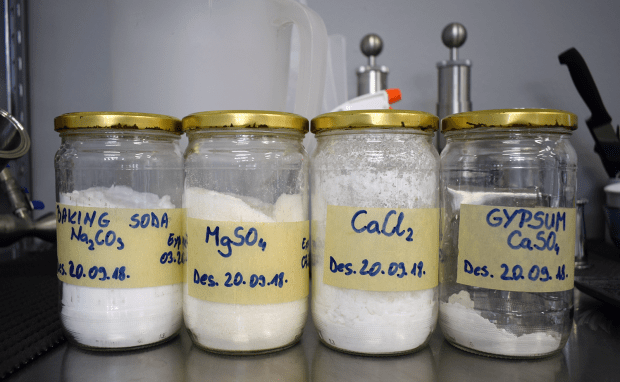
Before this first brew day, Darko took a sample of his filtered water and had it tested. Like most of the water in Cluj, it’s extremely soft, which means that the brewer can effectively build up almost any water profile they want. Since brewing in Cluj, Darko has added baking soda to his brewing water as a matter of course. It helps to harden the water and essentially provides a base for the other water treatments to work with.

The temperature is still a little low, so while mashing in, the heating element is on, bringing it up to the correct mash temperature
09:15 – Mash temperature reached
With the mash at 67℃, Marian starts the timer for the first step. The mash will follow a simple schedule, starting with one hour at 67℃, after which the temperature will be raised to 72℃, where it will rest for 15 minutes, before being raised to a mash out temperature of 78℃.

The first step will ensure that a good amount of starches are converted into simple sugars that will later be fermented, while leaving some more complex sugars that won’t ferment, giving the beer a fuller body and a slight sweetness. Step 2 stops the conversion, while step 3 gives the mash a more liquid consistency that makes filtration easier, while also reducing the time it takes to get the wort to a boil.

Brewing on new equipment is quite similar to brewing a new recipe. So even though Darko has brewed Opium hundreds of times, he’s carefully writing down each step of the process – in fact, he’s probably taking as many notes about this brew day as we are.
09:45 – Preparing the FV for an acid wash
While the mash does its thing, it’s time to focus on giving the fermenter a final acid wash. It was deep cleaned two days before, and just needs to be reassembled before hitting it with a sanitizing acid solution. Marian carefully replaces the various valves and other pieces, making sure to tighten them up properly. Once done, 100 ml of peracetic acid is added to 100 litres of cold water and recirculated around the FV for an hour.

Today’s batch of Opium is going into the big, 2000 liter fermenting vessel. It will only be just over half filled however, with around 1,100 litres of beer in total. This allows the guys to brew a large batch, without having to worry about getting showered in beer when it comes to dry-hopping under pressure for the first time.
10:25 – First stage of mash complete
The first stage of the mash was due to last an hour, though it went on a little longer in the end due to various distractions. A few extra minutes of mashing won’t be a problem – in fact, some breweries mash over the course of several hours. The racking arm continues to stir the mash, and ten minutes later, the heating element is switched on once again, cranking it up to 72℃ for the second step.
11:00 – Lunch break
With the acid wash under way and the mash coming up to temperature, now is also a good time to grab a bite to eat. Masks come off and social distancing is thoroughly observed.

11:40 – Iodine test
As the mash temperature increases, Darko takes a small sample of the wort to carry out an iodine test. The test is used to check that all of the starches have been converted into sugars. To carry out the test, simply put a small sample of wort onto a light coloured dish, and add a drop or two of iodine. If it remains black, there are still starches present in the wort, and it should stay longer in the mash tun to ensure full conversion. If it turns yellow, or clear, conversion has been successful and you can safely move on to the next step.

Not all brewers carry out an iodine test, but even after several years of professional brewing, Darko does it every time. After all, it doesn’t take long and gives you peace of mind. In this case, the sample is a bit darker than normal, suggesting that there are still starches present, but the brew proceeds as planned.
12:00 – Recirculating the mash
The mash reaches the mash out temperature of 78℃, so both the heating element and the racking arm that has been mixing the mash are switched off. The idea is to let the grains settle down and form a good filter bed. The sparge water will trickle through this filter bed, stripping away the last sugars from the grain.

At this time, Darko speeds up the recirculation pump slightly. This draws wort from the bottom of the mash tun (underneath the filter) and sprays it back over the top of the grains. Darko is a bit concerned about the amount of particles, malt husks, and other solids that have made it through the filter. However, these are being returned to the grain bed and are bound to clear up soon.

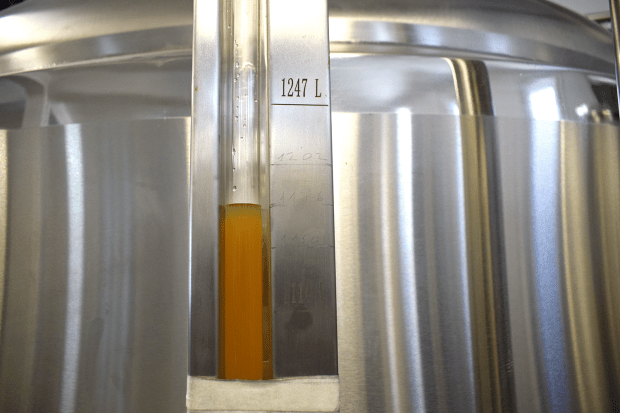
By 12:18, the wort has cleared up considerably, so it’s time for the mandatory sight glass photo
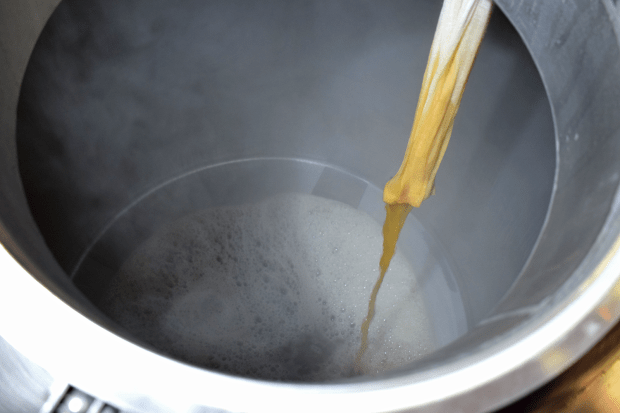
12:20 – Transfer to kettle begins
After the grain bed has settled and the wort is running clear, the guys begin pumping the wort to the boil kettle. A fine mesh bag is fixed onto the transfer pipe inside the boil kettle, which acts as a last defence against any stray husks or other solids.
After transferring around 100 litres into the kettle, the sparge is started. The plan is to add in around 550 litres, but things don’t quite work out as you’ll see in a bit.
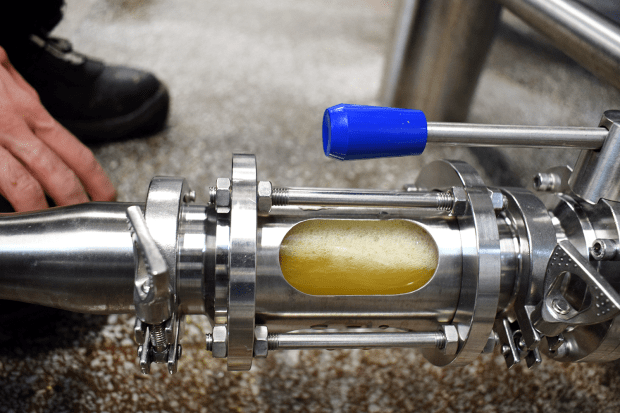
12:42 – Taking the first gravity readings
With the transfer underway, Darko takes a sample of the first runnings, which will be a good indicator of how successful the mash was. Darko cools the sample, and takes both a hydrometer and a refractometer reading. However, in the end the hydrometer didn’t have a large enough scale to measure the first runnings – great success! So, relying on the refractometer, we recorded a gravity of 1094.
13:40 – Sparging difficulties
We had anticipated that the transfer and sparge would take around an hour and a half, but at this point it seems as if there’s been a miscalculation of sorts. With only 800 liters in the kettle, we’re nowhere close to the planned 1,200 litres of wort. All of the sparge water has been used, so the only thing to do is do an additional sparge using cold water. This isn’t the end of the world, but it will reduce the temperature in the boil kettle, which means it’ll take longer to reach a boil. Additionally, it could also drop the gravity of the wort, impacting the final ABV.
The lid is kept on during the sparge to prevent filling the brewery with steam. The boil kettle lid is also shut throughout the boil – another detail we’ll explain in a bit.
14:30 – Transfer to kettle complete
In the end, an extra 150 litres of cold sparge water was added, and 1,176 litres was gathered in the kettle, just a little under the target volume of 1,200 litres. The good news is that during the 2-hour transfer, the wort in the kettle has been steadily increasing in temperature, and is already almost at a boil.
With the required volume in the kettle reached, we can move on to the next step:
14:40 – Digging out the mash tun
The new equipment is a huge step up from the original 200 litre brewery, which is both good and bad. Digging out this mash tun should be easy in theory, because it has a system in place to automatically plow out the majority of the malt. However, this being the first time it’s been used, a rookie mistake was made: the plow was dropped too early, and the grains were too thick for it to push through. So it was mostly done by hand, but next time the lads will know what to do with it.

Darko is really proud of his system for getting rid of the spent grain. In fact, he’s so proud of it, that it was the only thing he insisted we must take photos of. It’s basically one large plastic trough that just about carries a full load of grain from the mash tun, and gets bonus points for being able to be lifted by a fork lift truck. And just in time too, as Gelu the farmer is here with his trailer, ready to pick up some tasty treats for his cows.

15:00 – Boil starts
This is the first time the lads have worked with steam to boil their beer, but after extensive tests with water, they’ve more or less got the system figured out. The wort reaches a good, rolling boil, without being too vigorous. This is ideal, as it’ll encourage hot break, while avoiding a boil over when adding in the hops. Normally, we would show you photos of the hot break, but with the lid firmly shut, we can’t get any good ones. And here’s why:

This kettle is designed to be used with the lid closed, massively reducing steam in the brewhouse. It is fitted with a steam condenser, which ensures that all the bad things that you want to boil off in your beer, such as DMS, are drawn out of the boil kettle. Jets of cold water keep the steam condenser cold, drawing steam from the hot kettle into it – second law of thermodynamics, baby! The steam is then transformed into water, which is drained away, along with the compounds responsible for certain off-flavours.

Meanwhile, Marian weighs out some Nugget, which are the hops going in at the boil
15:10 – Bittering hops added
After 10-minutes of monitoring the boil, the first hops are added in. This is where things get tricky. As the guys are brewing up a batch of Opium, the recipe has to be kept fairly consistent with previous batches. Scaling up is not as simple as multiplying your old recipes by X amount, as there are too many factors at play. Obtaining the right amount of bitterness will come with time, but today, Darko’s careful calculations will ensure that this batch will be on par with the Opium we know and love.

Standing guard just in case of a boil over – luckily, this brew day doesn’t result in the kettle being baptized in hot wort and hops
15:45 – Irish moss added
With 15 minutes of boil to go, Darko adds in the Irish moss. This is a ‘kettle fining’ agent made out of seaweed, which encourages solids to clump up and drop out of suspension, creating a compact layer of sediment at the bottom of the kettle.
16:10 – End of boil
After the boil ends, it’s time to quickly drop the temperature of the wort to around 75℃. Hophead use a plate heat exchange, in which cold groundwater and glycol flow through one side, and hot wort through the other. The plates facilitate a heat exchange, with the wort coming out of the other end much colder, before being returned to the boil kettle.
16:25 -Whirlpool start
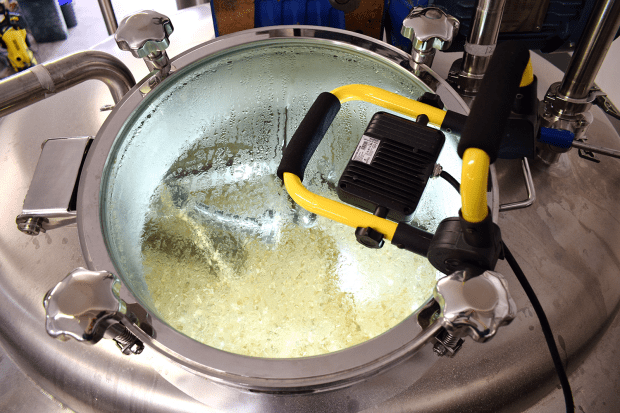
It doesn’t take long to get to a temperature of 74.7℃. This is lower than the desired whirlpool temperature of just under 80℃. However, experience has taught Darko that the temperature will rise a few degrees once the hops are in. The recirculation is shut off, and the whirlpool pump turned on. Darko throws in a generous dose of Cascade hops, and as he predicted, this brings the temperature up to 78.4℃. It’s an ideal temperature for minimizing the bitterness from the last hop addition, while extracting aroma compounds. The hops are left in the kettle for 15 minutes, before the pump is stopped and the wort left to rest.
16:50 – Transfer to FV starts
After a 10-minute rest, the transfer of wort from the boil kettle, through the heat exchange, and into the fermenting vessel begins. Glycol and groundwater are used to chill the wort down to around 24℃, which then drops to around 21℃ when it reaches the FV.

Ensuring the correct temperature is a bit of a balancing act. You have two control points: the faster the wort flows, the hotter it will be, while the faster the glycol flows, the cooler it is.
During the transfer, pure oxygen is bled into the wort to aerate it, which helps the yeast during the growth stage, and enables fermentation to get going sooner. Darko is probably one of the few brewers in the country who adds pure oxygen at this stage.

When adding pure oxygen to the cool wort, it’s all too easy to add a bit too much. This causes the wort to foam up like crazy, but it’s easily fixed by closing the oxygen valve slightly.
17:25 – Transfer complete
After just 35 minutes, all of the wort is now in the fermenting vessel, and Darko estimates that he’s got around 1,100 litres in there. The wort is now at the right temperature to take an accurate gravity reading.

At 1067, it’s a little bit too high, but Darko has a plan to get it down to the desired 1063
Darko figures out he’ll need an additional 30 litres of liquid to get to the correct gravity. There is still wort left in the hose and chiller, and water is used to push this into the tank, which is measured through the flow meter. A final gravity check confirms that we’re now on target.
17:40 – Preparing the yeast
Marian measures out the yeast, and begins to hydrate it. For Opium, the guys are using US-05, and since it’s a dry yeast, it’s best to let it soak in pre-boiled, warm water for around 25 minutes or so. The lid is kept on it and the pot carefully sanitized, to avoid introducing wild yeasts or other bacteria to it.

Meanwhile, it’s time to give the brewery a good clean.

The new Hophead brewery is crossed by a series of ‘trenches’ made by Darko, which ensure that the cleaning process is quick and painless: a couple of minutes with the pressure washer and a broom, and it’s all squeaky clean.

A clean brewery is a sexy brewery

Marian dutifully fulfills his role as ‘the human stir plate’, giving the yeast a shake every now and then to ensure that it’s properly mixed in
18:25 – Yeast pitched
After much swirling, the yeast is ready and Darko climbs the ladder to the top of the fermenting vessel. The yeast is pitched into the tank, where all going well, it’ll do it’s thing and feast on the sugars that the guys have worked so hard to provide for it. The tank is sealed shut, the spunding valve set, and now the only thing to do is wait for it to get going.

18:30 – Brew day done
After cleaning up the last parts of the brewery, we crack open a beer and toast a successful first brew day. While things maybe didn’t run as smoothly Darko would’ve liked, and there were some miscalculations along the way, for a first brew, it actually went really well. There are lessons to learn and improvements to make, but that’s a given when you use new equipment for the first time.

One of the best beers you’ll ever have is the one you can enjoy after a hard day of brewing – in our case, it’s the latest Hophead beer, Lullaby
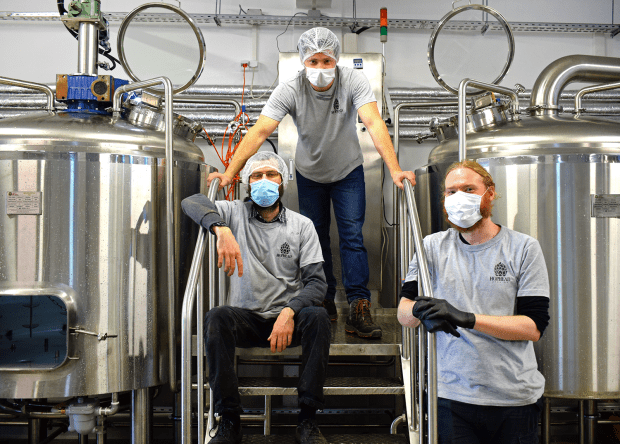
Say ‘cheese’ – don’t worry, people can still tell you’re smiling even with the masks on
For us, this has been a bittersweet brew day. On one hand, we got so used with having Hophead next door, and both us and the rest of the neighborhood will miss them dearly. But at the same time, we’re very proud of them and how far they’ve come. These are exciting times for Darko and Dana, and we can’t wait to see them grow and treat us to more exquisite beers. Best of luck, guys! Cheers!

One thought on “Brew Day Log: Hophead Brewing – Opium – first batch at the new brewery”