
Perhaps we’ve watched too many episodes of ‘How It’s Made’ when we were kids, but we’ve always been curious to see how the beer we drink is brewed, and we figured you might be as well. So on August 8th, we headed out to the Hop Hooligans brewery in Jilava, to document the making of one of their flagship labels.
Crowd Control stats:
- Style: New England IPA
- Grain bill: malted barley, malted wheat, oats
- Hops: Citra, Mosaic, Falconer’s Flight, El Dorado, Simcoe
- OG (original gravity): 1061
- FG (final gravity): 1012
- ABV: 6%
Part of their debut range, Crowd Control is arguably one of the beers that has defined consumer expectations for IPAs in Romania, and it has the most Untappd ratings among craft beers in the country. Given it’s constant demand, the hooligans are brewing it almost on a weekly basis, and have invested in three new fermenting vessels just to accommodate this schedule.
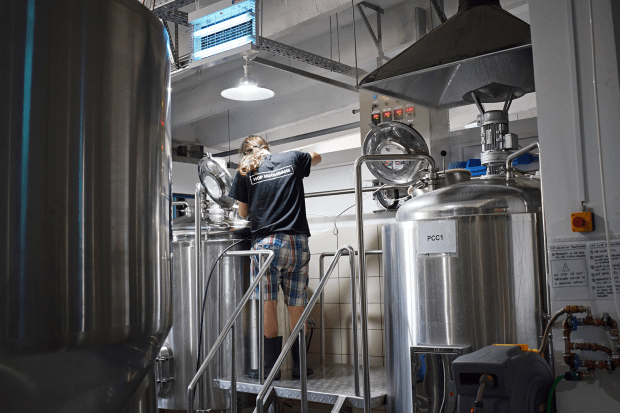
A look around the brewery
Before we break down the brew day, let’s take a tour. In terms of space, the brewery was a lot smaller than we had expected, considering the sheer number of different beers the guys put out each month.

The 1,000 litre, 2 vessel brew house is cosy, and backed by an ever increasing number of fermenting vessels. At the time of writing, there are 5 large tanks each with a capacity of 1,600 litres, 6 smaller tanks at 800 litres, and one 800 litre bright beer tank. The larger tanks are generally reserved for core range beers such as Crowd Control and Sencha, leaving the smaller tanks free for experimentation. The bright tank is used to store beers that need a little longer to mature, or aren’t yet ready to can because of anything from bureaucracy to a lack of labels.

There’s all sorts of goodies fermenting away in these bad boys
The hooligans brew 3-5 days a week, and on top of their core range, they are constantly coming up with something new, and have released over 90 different labels. This particular batch of Crowd Control marks the 348th beer they’ve made so far.

With three new 1,600 liter fermenting vessels just added to the collection, the estimated total output for the hooligans goes up to 1,300 hectolitres per year
The canning line takes centre stage, proudly sitting between the row of smaller fermenters and the brewhouse. As the first brewery in the country to use cans rather than bottles, Hop Hooligans took quite a gamble, and to this day many of their fans still bemoan the alleged metallic taste, and dream about the day the hooligans go back to bottles (spoilers: ain’t gonna happen, folks). However, cans are proven to reduce oxidation issues, ensuring fresher tasting and longer lasting beer, and it’s likely that other craft breweries will shortly follow suit. While we were there, the guys were just finishing up with canning Slice of PI: Key Lime.

Moving into the cold store, we were hit with a refreshing 10°C, the ideal place to chill out (no pun intended) during the scorching Bucharest summers. The space is big, and packed with kegs and cans – though few remain there too long before being shipped out across Romania and beyond. Besides brewing, Cristi and Mircea spend a lot of time preparing orders, and during our 8 hour visit, a near constant flow of vans and trucks were picking up pallets of beer.

Cristi was valiantly working his way through a fair share of orders that day, so he didn’t spend that much time on the brew, but here’s some photographic evidence of him nonetheless
Back into the brewery, we took in the ingredient store, all neatly organized, with hops kept in 3 chest freezers, shelves of water treatments, and two rows of malt sacks stacked halfway to the ceiling. The malt storage room is state of the art, as far as we’re concerned, and although it doesn’t look like much, it even has a humidity monitoring system that takes readings every three hours, and sends out email alerts should anything be amiss.

Moving on we, were greeted by a number of beautiful oak casks, each filled with sumptuous treats, slowly maturing and soaking up the character of the various barrels they were in: tequila, bourbon, and peated scotch.

We spend quite a bit of time ogling this fermenting journal in particular, which tells the story of a beer we’ve been hoping to try since November 2018 (no point zooming in, we’ve kept it small for the sake of hype)
Next on the list is the Reverse Osmosis system, which is one of the defining traits of the Hop Hooligans setup. This is quite a rare piece of equipment among Romanian breweries (others who have it include Capra Noastră), but given the water quality in Bucharest, it is much needed. The interesting thing to mention about having such a water treatment facility on site means that all the water in the brewery can be either RO’ed, or plain tap water. Basically, the Hop Hooligans brewery uses RO’ed water for everything, from brewing to cleaning (and yes, before you ask, the toilet water has gone through reverse osmosis as well).
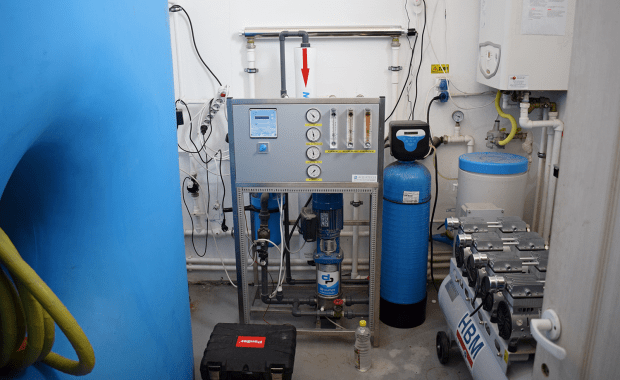
This bad boy is able to strip 250 litres of water of all minerals and chemicals each hour, leaving a blank canvas for the hooligans to work with

For those wondering, RO water has an incredibly smooth mouthfeel, and no taste
Finally, we check out the office, where social media shenanigans happen, orders are taken, and yeast cells are counted under the microscope. Our first impressions are of a small but efficient brewery, that acts as an office, production line, and lab. The setup is streamlined to the needs of the hooligans, and seemingly runs like clockwork, allowing the boys to concentrate on a multitude of tasks throughout the day.

We also get a sneak preview of Cristi’s dank meme collection the label for the upcoming Berea Clujenilor – take 2, brewed on August 2nd in collaboration with three Cluj breweries: Blackout Brewing, Hopdrops and Player One Brewery
So now that we’ve given you the tour, let’s get the brew on the way.
7:15 – Mashing in
The brew day started fairly early, with Cristi normally arriving around 7am to get things going. Now, we’re not early morning people, so we missed the mash in, but we interrogated Cristi when we arrived and got all the details. The strike water is heated the previous day, allowing the boys to come in and get going pretty much straight away. Likewise, they used pre-milled grains from Simpsons, that are weighed out and set aside by the mash tun the night before. The 255 kg grain bill for this batch includes Simpsons Extra Pale malt, flaked oats, and malted wheat.
After the water was stripped down through reverse osmosis, the hooligans then manipulate its mineral makeup to suit their needs, through a mixture of gypsum, lactic acid, Epsom salts, and so on.

Minerals are good for you, kids!
Once they’ve built the water profile they need, it’s time to add in the grains. This is slowly poured into around 700 litres of treated strike water, and mixed to create a coarse porridge-like consistency. They aim for a mash in temperature of 69°C, which ensures a full bodied beer. The mash is left for one hour to enable full conversion of starch to sugar, during which time the temperature will typically drop to around 66 – 65°C depending on the ambient temperature.
08:20 – Sparge & Transfer
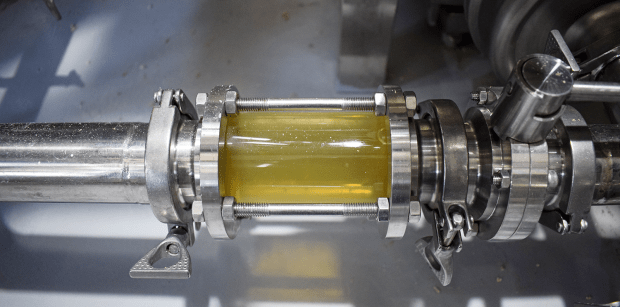
After mashing for an hour, Cristi begins the slow and steady process of sparging and transferring the sweet wort from the mash tun to the boil kettle. During this phase, the liquid is separated from the grains via a sieve in the mash tun.

It’s then slowly pumped into the boil kettle, where a muslin bag further filters out any unwanted grain pieces that can cause off-flavours in the finished beer. During the transfer, hot water at around 75°C is gently sprayed onto the grain bed, to rinse off any residual sugars and to dilute the sweet wort to the desired gravity.

Other breweries might do this step faster, but the hooligans believe that slowly transferring the wort and gently sparging enables the sparge water to collect all the valuable sugars, without disturbing the filter bed and letting unwanted grain husk enter the kettle. This slow and steady approach also affords them 2 to 3 hours in which they can catch up on orders, marketing, cleaning, and paperwork.
We also chatted with Mircea about the slow sparge, and the topic of hot-side aeration (HSA) was brought up. HSA is the accidental introduction of oxygen into the beer during the brewing process, an issue that can be detrimental to the finished beer. Unlike adding oxygen before fermentation to help the yeast get going, HSA can oxidize the wort, causing shelf life issues.
Opinions on HSA are often mixed, with some brewers dismissing it as a real issue altogether. Either way, a little extra care and attention can ward off unwanted problems further down the line, and it’s good to see the boys taking these additional measures to ensure their beer is the best it can be.
09:00 – Mircea arrives
At this point, Mircea joins the fray, keeping an eye on the sparge and transfer, and catching up with Cristi with regards to where they’re at with the brew.
Mandatory photo of the transfer – all the cool kids are doing it
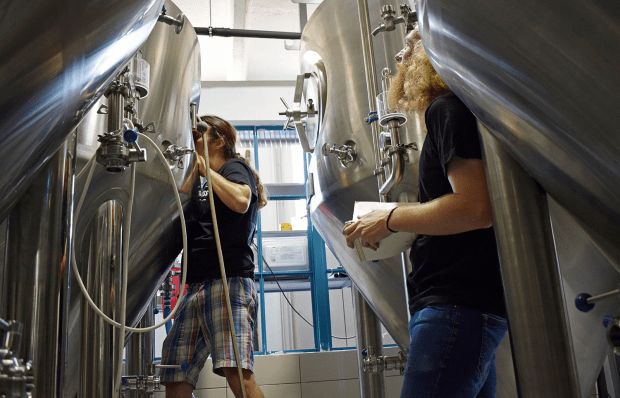
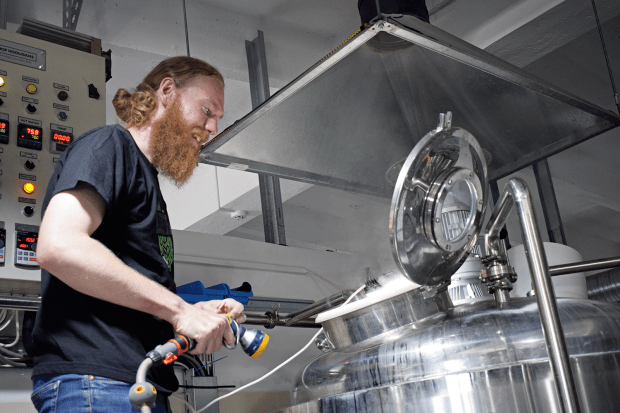
09:30 – Cleaning the fermenting vessel
After giving us the tour, Mircea begins to clean the fermenting vessel that this batch is going into. The tanks are normally cleaned on the same day as they will be filled, to reduce any risk of infection. A first spray dislodges the worst of the mess from the previous batch, before a hot caustic wash is carried out. A hot solution of caustic soda is recirculated through the heat exchange and into the fermenting vessel to dislodge all organic matter. This is typically left to run for at least an hour before the solution is removed. The tank is then thoroughly sprayed once more to clear the mess. At this point, the tank looks clean, but still needs to be hit with acid.
A solution of peracetic acid is recirculated through heat exchange and fermenting vessel for another hour or so. This sanitizes the entire system, keeping the cooled beer safe from infection.
10:20 – Taking gravity readings
While the cleaning cycle is running, Mircea checks on the sparge, taking a gravity reading of the beer as it’s transferring. It’s useful to take gravity readings at the beginning of the transfer (first runnings), during the transfer, and at the end of the transfer (last runnings). They use a refractometer to do this, as it compensates for heat, whereas the more traditional hydrometer needs the wort to be at 20℃.
Checking the first runnings lets the brewer know how successful the mash was, and how sweet the solution is. It’s important to check the last runnings, as if you over sparge, you run the risk of extracting tannins from the barley husks, which can lead to off flavours in the finished beer. Checking the gravity during the transfer is useful to check whether the sparge water is running through the grains too quickly, and not rinsing the sugars as effectively as it should.
With a reading of 7°P, everything is on track. We asked whether after 106 batches of Crowd Control, they still take readings at each point. They’ve refined the process to the point that everything is more or less consistent from batch to batch, but they believe it’s always worth taking readings, as you can never be sure if the quality of ingredients will be consistent from batch to batch.
10:40 – Sparge and transfer finishes
Two hours and twenty minutes after Cristi started the sparge, the required volume of wort is in the kettle at the right gravity. Mircea explained that he was hoping to make this slightly stronger than normal, as the second half of the batch (which will be brewed the following day), should be a little lighter. In this way, a small portion of the lighter half can be collected and used for yeast starters. During the transfer, the two heating elements were on, rapidly heating the wort as it entered the kettle. It’s important to heat the wort up quickly, to encourage ‘hot break’, the coagulation of proteins and polyphenols, which clump together and drop to the bottom of the kettle.

Before we move on to the next part, we want to quickly mention the control panel. While most brewing equipment includes this by default, Mircea built his own from scratch, making it very customizable when it comes to the settings for the heating elements, and allowing the water to reach a boil in an hour (as opposed to 4 hours, in some cases). If you fancy making your own, check out the Electric Brewery.
11:00 – Boil starts
With two heating elements on, the wort soon reaches a boil, and the guys switch the second element off to prevent it boiling too vigorously.
No brew day is complete without the danger of boiling over, so we stand watch just in case
While there are no bittering hops in Crowd Control, the guys boil for a full hour to ensure the wort is sterilized.
11:40 – Digging out the mash tun
After dealing with some deliveries and pickups, attention is turned to cleaning out the mash tun. The excess wort is drained, and the dried spent grains are removed from the mash tun into sacks.

A home made, custom sack holder is used to ensure no grains fall onto the floor – another personal touch to make everything as user-friendly as possible
Once all the sacks are filled, they’re tied up and taken outside to be stored in large, open containers. Later in the day, one of the local dairy farmers will drop by to pick them up, ready to be used as cattle feed for some lucky cows.

‘Porridge’ out of the way, the honour of cleaning the mash tun goes to Mircea
11:50 – Add minerals & yeast nutrients
With 10 minutes left of the boil, Mircea adds in a packet of yeast nutrients and some additional water treatments. The nutrients will help the yeast to get started, while the extra minerals help the brewers attain the optimum PH level, and adding additional character to the beer, such as a pleasing mouthfeel, and enhancing the bite from the hops.
12:00 – Boil ends
After an hour, the boil is finished and the heating element is switched off. At this point, there are still no hops in the wort, which will all be added during the whirlpool stage. But first, the wort needs to drop down to 90°C. Sometimes, they’ll recirculate the wort from the kettle through the heat exchange to quickly drop the temperature, but as the heat exchange is currently being cleaned, they’re leaving it to drop naturally today.
13:40 – Harvesting the yeast
For this brew, the hooligans are using yeast taken directly from batch 105, by hooking up a hose to the bottom of its fermenting vessel. By opening the valve slowly and carefully, the yeast that has settled to the bottom of the tank slowly dribbles out into a sanitized bucket. The first runnings are discarded, and 10 – 12 kg of the good stuff is collected, ready for use.

13:55 – Whirlpool starts
The wort is finally down to 90°C, which means that Mircea can add in the whirlpool hops, 1 kg of Falconer’s Flight. It’s important to add the hops at this lower temperature to reduce the bitterness they’ll give, while preserving more of their precious essential oils, which ensures more hop aroma in the finished beer. The whirlpool will be left to run for 30 minutes, distributing the hops throughout the wort.

The remaining hops will be added later, during dry hopping, and will include Citra, Mosaic and El Dorado.
14:15 – yeast viability check
With the whirlpool doing its thing, it’s time to carry out a yeast viability check. The hooligans use liquid yeast, and for Crowd Control they use London Ale III. They reuse a lot of their yeast, typically for 5 or 6 generations before it starts giving off flavours. Today, they’re pitching the 6th generation of this particular batch of yeast. Each generation is slightly different, so if you find that there are subtle differences between each lot of Crowd Control, you can typically attribute this to the evolution of the yeast. Before pitching, the yeast will be evaluated to check its viability.

Using methylene blue, you can see which yeast cells are dead. Living cells contain an enzyme that strips the colour out of the methylene blue, while the dead ones are penetrated by the dye, making them stand out under the microscope. In a viable yeast culture, you’re aiming for at least 90% living cells, although the hooligans have made batches with percentages as low as 50% by adding more yeast volume, so it really is a matter of getting to know the viability of your yeast and how much it can take from one generation to another.

But here, have a look for yourselves
The history of yeast generations is thoroughly recorded in a ‘yeast family tree’, with photographic evidence of changes that occur throughout time.

Emil Christian Hansen would be proud
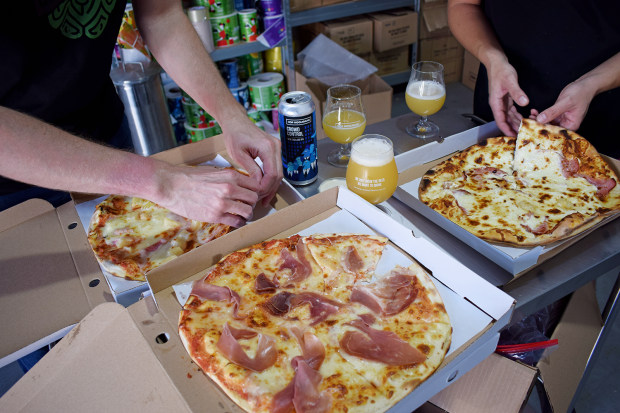
After confirming that generation 6 is good to go, it’s time to tuck into some pizza, washed down with batch 103 of Crowd Control, and some freshly canned Key Lime.
While we’re enjoying this feast, Cristi is somewhere in the background, getting very excited about a chili pepper delivery
14:30 – Whirlpool end
After around 30 minutes of spinning the hops around the kettle, the whirlpool pump is switched off, allowing the hop particles and protein clumps to drop to the bottom of the kettle. They’ll form a compact layer beneath the transfer valve, ensuring they won’t end up in the fermenting vessel. The guys wait one more hour to allow everything to settle out fully.

We use this time to snoop around the fermenting vessels, and because we’re a couple of sour fiends, we treat ourselves to this tasty tipple of the new Sourpuss, with sour cherries
15:30 – Transfer to fermenting vessel
One hour later, it’s time to start transferring the wort into the freshly cleaned fermenting vessel. During the transfer, the wort will pass through a heat exchange, lowering the temperature to 22°C. If it’s hotter, the yeast can produce off-flavours, or even be killed altogether, while if it were colder than around 17°C, they run the risk of slowing down fermentation, stressing the yeast, or not fermenting at all.
Cold water and glycol pass through the heat exchanger, working together to get the wort down to the correct temperature. The water and glycol heat up and the wort cools. The now relatively hot water is returned to the hot liquor tank (HLT), ready to be used in tomorrow’s batch, saving energy and reducing waste.

Out of the heat exchange, the wort is pumped full of pure oxygen as it flows into the fermenting vessel. This helps the yeast start multiplying, and the more healthy yeast cells there are, the faster it will begin to ferment.
15:40 – Yeast pitched
With the wort steadily flowing into the fermenting vessel at the desired temperature, Mircea grabs the bucket of yeast from earlier, climbs the ladder and pours it into the tank to join the wort. Everything the yeast comes into contact with must be kept sanitized, so an acid solution is sprayed on the edge of the bucket and the port at the top of the fermenting vessel. At this point, the yeast and the wort are highly susceptible to infection, so it’s important to handle each step with care. With the yeast pitched, the fermenting vessel is shut tight.
16:00 – Transfer finished
Within half an hour, all of the wort has been transferred into the fermenting vessel, so the pumps are switched off and the valves shut. Cleaning up is quick and easy, with the hops and proteins at the bottom of the kettle being sent down the drain. The kettle gets a quick rinse with water, before clean, hot water is used to push the last of the beer that is in the hose into the fermenting vessel.

With all the wort safely in the tank, it’s time to finish cleaning, a short process that takes only 20 minutes or so. The hooligans have set up the brewery so as to streamline the cleaning process, with all dirty rinse water flowing directly into the drain – they barely even need to clean the floor. In other breweries, this step can take far longer.
16:25 – Gravity and ph readings
Before calling it a day, the guys take a few last samples, just to check that they’ve hit all their targets and can sleep easily. The samples are taken from the fermenting vessel directly, and since it’s cooled down to around 22°C, they’re likely to get more accurate readings than earlier on in the process when they were measuring hot wort.
They use a hydrometer to take the original gravity reading, which comes in at 15.2°P, pretty much perfect for Crowd Control, though a little lower than Mircea had hoped for in terms of brewing a lighter batch tomorrow. The PH reading also came in on target, and all is good in the world.
For us, it’s the end of the day, and we prepare to pack up our things, grab our motorbike helmets from the cold store, and head out. The boys will stick around a little longer though to finish up the day’s paperwork. And that sums up the whole operation at Hop Hooligans.

Say ‘cheesy hops’, everyone!
Mircea and Cristi and not just brewers, they’re also marketers, promoters, packagers, distributors, lab rats, planners, stock managers, office workers, and supervisors over their small staff. Throughout the 7 and a half hours we spent at their brewery, they have worked tirelessly, without taking a single break, and if it’s not passion driving them, we don’t know what is.
So, now that you know how it’s brewed, the next time you check in your Crowd Control at a craft beer bar near you, savour in the taste more than just the thirst quenching hops, but take a moment to reflect on the care and attention given to every drop of beer in the glass.
PS: we’ve also found this really neat piece of history, showing the brewing of the very first batch of Crowd Control, back in October 2016. A lot has changed since (and not just the fact that Mircea is no longer brewing dressed up as Mario from Super Mario Bros). Do check out the video here.
Cheers!


One thought on “Brew Day Log: Hop Hooligans – Crowd Control batch 106”